Tips for cleaning your camping equipment
28 November, 2019
Whether you have a caravan, motorhome or tent, it’s essential to keep all your camping equipment clean. A thorough cleaning will make your equipment last longer and will make preparations for the next season a bit easier. What should you pay attention to when preparing it for the winter? We’ve made a useful checklist for you for each type of camping equipment.
Whatever type of camping equipment you use, it’s best to clean it right after your holiday. So don’t start putting your photo album or scrap book together, however tempting that is. Putting the cleaning off just makes the job even worse. When it comes to stubborn stains or mould, speed is important. So roll up your sleeves and put your back into it! We’ll give you a hand with these tips.
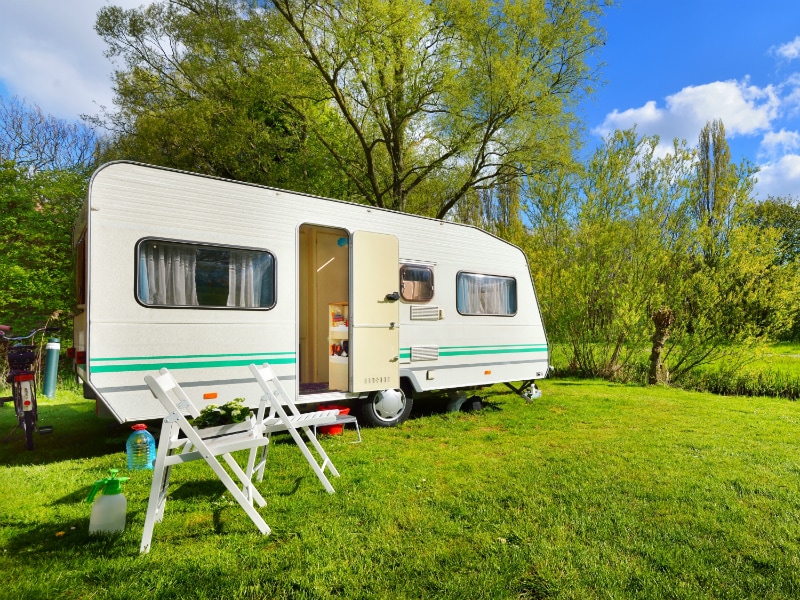
Use a checklist to make your caravan ready for the winter.
Tips for cleaning your caravan
Cleaning and making your caravan ready for the winter is more than just a quick wipe down. A good cleaning routine is not only important for hygiene, but also for the lifespan and safety of your vehicle. To make sure you don’t forget anything, we’ve made this useful checklist for you. Just tick them off!
1. A good rub down: inside and outside
Put your caravan back into storage as clean as possible. If you leave dirt on it there’s a good chance you’ll never get it out. Consider the following points when cleaning:
- Work systematically so you don’t miss any parts.
- Work on the outside from bottom to top to prevent streaking. The roof is the last part to clean.
- When cleaning, whatever you do don’t use car shampoo. This can cause irreparable damage to your caravan. There are special cleaning products on sale for your caravan.
- It’s best not to use a high pressure hose, just a ‘normal’ water hose. The force of a high pressure hose may cause damage.
- A wax coating will protect your caravan against weather conditions and discolouring during the next season. Add a wax coating after finishing all the cleaning and when the caravan is dry.
2. Visual check
Check carefully to see whether there are scratches in the paintwork or cracks in the seals or rubber. Does anything need repairing? If so, do it now. Don’t forget to order any new spare parts now. That way you can deal with any defective items before your next holiday and immediately restock your supply of spare parts. Nobody wants to wait for spare parts just before their holiday.
3. Gas
Check the caravan or motorhome’s papers to see if the gas supply needs to be inspected (that should be once every two years). Is it due now? Check the gas connection, the gas hose and the gas protection. This last point includes blowing out the gas flame, after which the gas supply must go off by itself within one minute.
If you have gas bottles in the caravan, remove them before taking the caravan to the storage, and keep them safe at home.
4. Is the caravan still waterproof?
It is very important that your caravan is waterproof. For new vehicles, checking this is a requirement to maintain a valid guarantee. Here, too: repair any defects immediately.
5. Check your tyres
For a start, check the tread on your tyres. Each tyre should have a tread of at least 2.5 millimetres. If your tyre has been worn down unevenly, that might indicate faulty alignment or the wrong tyre pressure. Tyres older than six years must be checked by a qualified expert.
When you take your caravan to the storage, you can inflate the tyres to a maximum of 0.5 bar above the recommended tyre pressure. This will prevent the tyres from flattening out. Make sure that when preparing for the next holiday, you check the tyres again, to make sure they are at the correct pressure. And don’t forget the spare tyre, that must always be at the correct pressure!
6. Electrical and lighting check
Check that the indicator, brake, fog, number plate and reversing lights work. Also check the control panel for the interior lighting in the caravan.
7. Recharge batteries
Remove all batteries from the caravan and connect them to a trickle charger at home. It is important for the lifespan of the battery that it remains charged, and a trickle charger is the most suitable.
8. Locks, hinges and rubber
You can keep the rubber seal round the doors and windows flexible by using talc or a special maintenance product. Check that the locks and hinges are working properly and lubricate them if necessary.
9. Water check
First make sure that all water taps still work. Clean and disinfect the pipes and the drinking water tank. Done that? Make sure you blow through the pipes and plungers to remove any water. Any remaining water can freeze in the winter and cause damage.
10. Fridge and heating
Check to make sure the heating and the hot water installation still work well. Make sure the refrigerator (which you have cleaned) works as desired.
11. Toilet
Clean the toilet, the seal and the flap thoroughly. You can treat the toilet with a silicone spray. Do not apply Vaseline or cleaning liquids to the seal. Make sure you don’t store any toilet fluid in the caravan. Just like water in the pipes, this can freeze and cause damage.
12. Caravan cover
A good caravan cover can extend the lifespan of your caravan significantly. Always choose a cover that is made especially for caravans and don’t use a tarpaulin. These polythene covers may be waterproof, but they don’t breathe. Rust, damage to the aluminium and mould may be the result. Blogger Lucia tells you exactly what you should look for when buying a protective cover.
13. Final check
Finished with the cleaning? You can now take your caravan to the storage with peace of mind. But still consider the following:
- Leave cupboards, door and windows slightly ajar in the storage. This will prevent condensation and mould in the caravan. Don’t open the windows too wide or you may be visited by mice.
- Take a photo of the caravan before it goes into storage. If any damage occurs while in storage you can easily use the photos to prove this.
- Caravan in storage? Great! But don’t ignore the other camping equipment; the awning, windshields, cushions, barbecue, coffee machine etc. also deserve a long life!
Tips for cleaning your motorhome
Make your motorhome ready for the winter as soon as possible after you get home.
You can use the checklist for caravans above when cleaning your motorhome. Add the following points to the list
- Empty the fuel tank completely. This will prevent condensation in the tank.
- Do not engage the handbrake, but put the motorhome in gear. At the start of the following season, do not initially use the brake. Drive a short distance very carefully and then brake. If you use the brakes too soon, they may jam. It’s a good idea to put a brake wedge in front of one of the wheels.
- Check the antifreeze level in the cooling system against frost resistance, and if necessary fill it up.
Washing your motorhome or caravan in a carwash
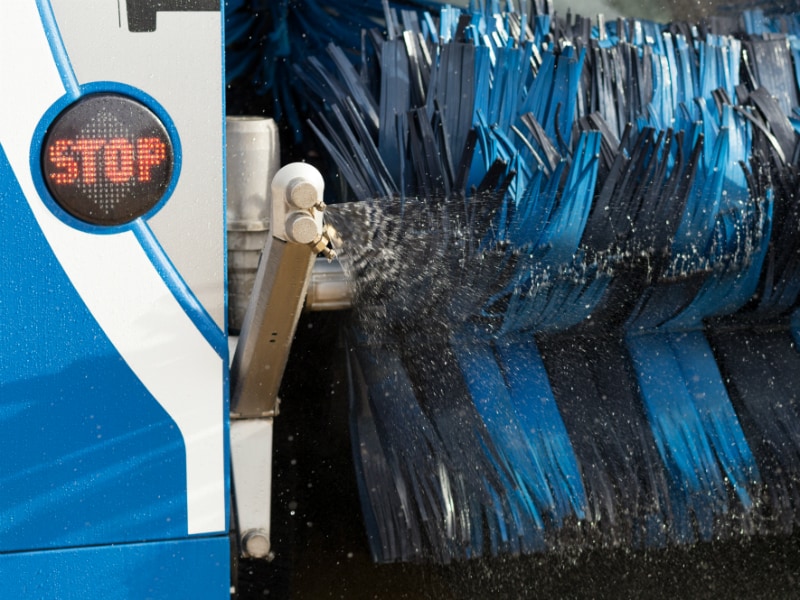
Check to see if your camping equipment can go through the carwash
If you’re not in a position to clean the motorhome or caravan yourself, or if you prefer not to do so, you might want to choose to use a drive-through carwash. But don’t just drive in, the following points are extremely important:
- Ask the manufacturer if you can take your camping equipment through a carwash. Not all models are suitable for this! If an awning has been fitted on the side, make sure that this is suitable. If in doubt, never use a carwash.
- Ask the carwash whether they have special programmes for a motorhome and/or a caravan.
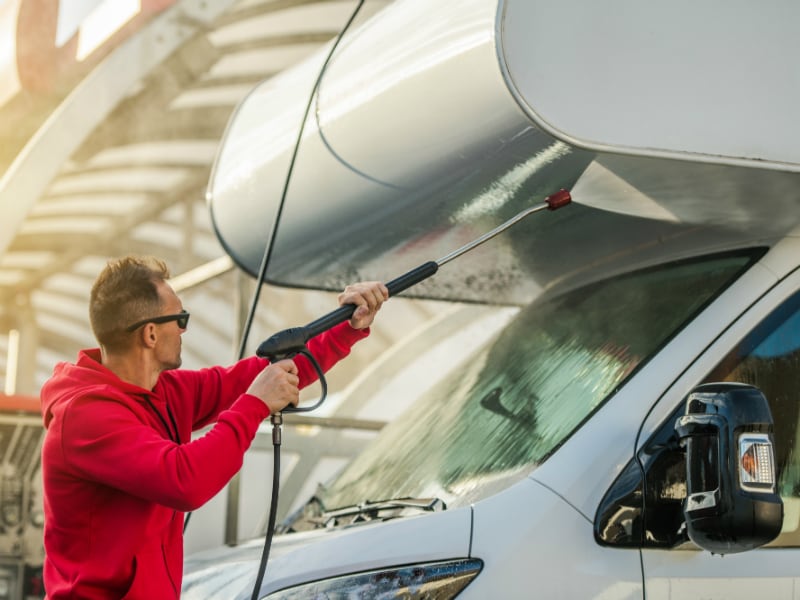
- Thinking of using a high- pressure hose? Check whether the motorhome or caravan can withstand this. Be sure when using a high-pressure hose to take care with the outside and the windows. Take care not to damage the thin layer of paint on your motorhome or caravan.
Tips for cleaning your tent

Taking care of your tent means less cleaning when you get home.
If you go camping with a tent only, maintenance would seem at first sight to be more straightforward. But a good tent also needs some care and attention. If you’re not careful, the tent may lose it waterproofing, for example. Follow these useful tips and enjoy your tent for much longer.
Before you go home
Prevention is better than cure. You can already take the lifespan of your tent into account while on the campsite. Consider the following points.
- Pitch your tent in a suitable place. The full sun, bird droppings and resin are not good for the condition of the tent canvas. Level ground and in the shade is the perfect place. If you pitch your tent under a tree, check to see if it is leaking any resin and that the tree is not full of (pooping) birds. By paying a bit of attention in advance you can prevent a lot of mess.
- Remove any stones, fir cones and other objects before you pitch your tent. Check to make sure someone before you didn’t leave any tent pegs in the ground. These can damage your groundsheet.
- Condensation from hot dishwashing water can damage the waterproofing of the canvas. Don’t do the washing up in or near the tent if possible.
- Placing a sheet under the tent when pitching it is very useful. This will ensure that the underneath of the tent doesn’t get so dirty, and that will save time cleaning it when you get home. It also provides extra insulation.
- Bird dirt on the tent? It’s best to get rid of it as quickly as possible, ideally on the campsite itself! Scrape of the stains or use a small amount of hot water.
- Take care when storing tent pegs and tent poles. Sharp edges may damage the tent.
When you get home:
- If you packed up a wet or damp tent, hang it up to dry as soon as you get home. This is especially important with cotton tents, the material is more prone to mould.
- When cleaning your tent, never use soap or detergent. This will affect the tent’s waterproof coating. Water is much safer.
- Brushing down your tent with a soft brush is usually sufficient. Use a small amount of hot water for stubborn stains.
- Resin stains on the tent? It might help to rub an ice cube over them. This speeds up the hardening process, making it easier to remove the hard resin. You can do this with your fingers or maybe with a small spoon or knife.
- Still got bird droppings on your tent? Remove them with hot water. If some light stains remain, these will usually disappear by themselves after a while.
- If you really need to use a cleaning product, buy a special tent cleaner in the camping supplies shop. Tent shampoos include Ultramar, HG and 123 Products.
- Store your tent in a cotton bag. Synthetic materials are not recommended, as they offer poor ventilation.
More cleaning tips for your camping equipment
If you want to find out more about using your tent efficiently, blogger Anouk can give you more tips on how to maintain your tent. And who knows, maybe you have your own useful cleaning tip? Share it with us, we are always keen to know more!


8 Comments
Hi
The advice is good, but does anyone have a good way of cleaning the top of a motorhome. Mine has an overcab bunk and even if I put a ladder up and a plank across the van to sit on, it is very hard to reach everywhere.
Try an extended brush attached to a hosepipe ot just kepp dipping the brush in a bucket of water. You can buy them at most good Caravan and Camping Stores . I bough mine from Trago Mills but I’m sure you will find them on Amazon etc. You might have to use some warm water a few times to get rid of some of the grime but used with Fenwicks Motorhome cleaner it really does the job . Fenwicks also produce a product called Bobby Dazzler which brings up a nice finish afterwards.
Hi Chris
Thanks for the tip. I have gone through two of those brushes. Both broke at the junction where the brush connects to the water fitting. My van sits near tress, so I get a lot of dirt on the top and need to get up high to bet any pressure on, even with Fenwicks cleaner.
Je ne peux pas le lire il n’est pas en français
Il s’agit de garder votre caravane / camping-car propre
Vous trouverez un site Web traduit en français via la page d’accueil ACSI
Thanks for the info
I have always cleaned my vans top to bottom
Especially after the season is finished because the dirt off the roof runs down the side of the van
Logic !